



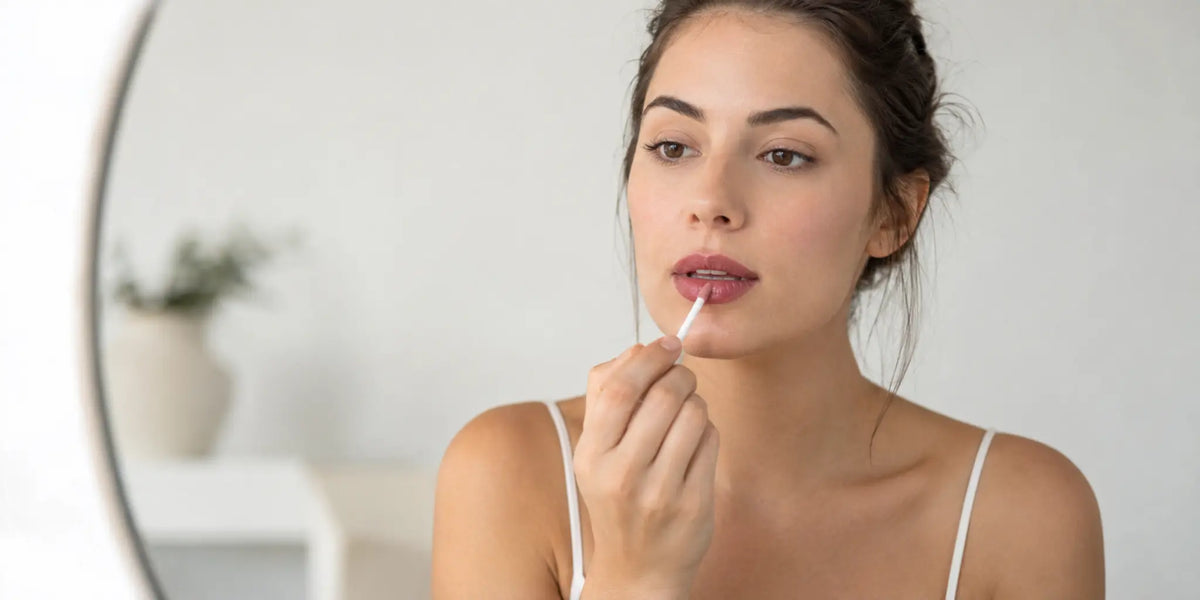
Lip Oil Before or After Lipstick? A Simple Layering Guide
Apply lipstick first and lip oil second when you want lipstick color with a glossy finish. Let the lipstick settle, blot once if it still transfers heavily, then place a small amount of oil at the center of the lips and spread it with minimal pressure. This order gives you more control than putting lipstick over a slippery oil layer.
Key Takeaways
- Lipstick usually goes first; lip oil is the finishing layer.
- A thin lipstick layer and a small amount of oil are easier to control than two heavy coats.
- Let lipstick settle or blot it once before adding shine.
- Place oil at the center first so less product reaches the lip edge.
- Formula pairings vary, so test the combination and follow both current labels.
Why Does Lipstick Usually Go Before Lip Oil?
Lipstick needs a relatively stable surface to deposit color evenly. Lip oil adds slip and shine, which can make a lipstick applied afterward move, skip, or look less even. Finishing with oil keeps the color step separate from the shine step.
The result still depends on the two formulas. A dry-feeling matte lipstick, a creamy satin lipstick, a sheer balm-lipstick, and a highly fluid oil will not behave identically. The order is a practical starting point, not a promise about wear, transfer, or compatibility.
This texture-first approach fits the current beauty conversation. Vogue’s March 13, 2026 lip-trend report describes glossy, blurred, stained, and sheer finishes as central to the year’s lip looks. IPSY’s July 28, 2026 report likewise notes growing interest in lip oils and products that combine makeup and lip care. Layering lets you adjust finish without replacing the lipstick color you already chose.
Lipstick First or Lip Oil First? Use the Finish You Want
| Desired finish | Recommended order | Application cue |
|---|---|---|
| Defined color with center shine | Lipstick, then lip oil | Keep most oil away from the perimeter |
| Even glossy finish | Thin lipstick, then thin oil | Let color settle before using light strokes |
| Soft, diffused color | Lipstick, blot, then tap oil at the center | Avoid dragging color toward the outer edge |
| Precise lipstick edge | Lipstick first; oil optional | Stop the oil just inside the lip line |
| Oil-only shine | Lip oil on clean, dry lips | Follow the oil’s label rather than adding lipstick |
How to Layer Lip Oil Over Lipstick
Check Both Product Labels
Step 01
Begin with lips that feel comfortable. Read the lipstick and lip-oil directions, including warnings and intended use. The FDA recommends reading cosmetic labels, following directions, washing your hands before use, and keeping containers clean and closed. If either formula causes burning, stinging, or discomfort, stop using it instead of covering the sensation with another layer.
Apply a Thin, Even Lipstick Layer
Step 02
Apply lipstick in a controlled layer rather than building maximum color immediately. Check the corners and lip line before moving on. A thinner base gives the oil less loose pigment to move and makes it easier to add more color later if needed.
Let the Lipstick Set, Then Blot if Needed
Step 03
Give the lipstick a moment to settle. If it still transfers heavily, press a clean tissue between the lips once. Do not rub the tissue across the surface. Blotting removes excess surface color while leaving the applied shape largely intact.

Place Lip Oil at the Center
Step 04
Wipe excess product from the applicator, then touch it to the center of the lower lip. Add a small amount to the upper lip if needed. Spread with short, light motions and stop just inside the lipstick edge when definition matters. A current Revlon layering guide also presents lip oil as a finishing layer over lipstick; the exact result still depends on the formulas you pair.

Check the Edge Before Adding More
Step 05
Press your lips together once, then inspect the corners and Cupid’s bow. If color has moved, lift the excess with a clean cotton swab rather than adding another heavy layer. If you want more shine, add a very small second amount only where it is needed.
How to Reduce Smudging and Color Transfer
No layering method makes two ordinary lip products transfer-proof. Oil can soften the look of lipstick and may move pigment, especially when the base is creamy or heavily applied. The most reliable controls are simple: use less of each product, allow time between layers, and keep most of the oil in the center.
Avoid repeatedly sweeping the applicator across fresh lipstick and returning it to the tube. Pigment can collect on the applicator and enter the container. The FDA’s microbiological safety guidance advises keeping cosmetic containers clean, washing hands before application, and not sharing cosmetics. If you layer often, read the guide to keeping a lip-oil applicator clean.
Where a Clear nooni Lip Oil Fits
Shopify currently lists nooni Appleclear Lip Oil as Active and available for sale. The size is 3.7 ml / 0.12 fl oz., and the current product information lists apple seed oil, hyaluronic acid, and jojoba seed oil. It describes a clear, glass-like glossy finish and a pointed doe-foot applicator.
Important limitation: the current official directions say to apply the product evenly to clean, dry lips and reapply as needed. The page does not promise lipstick compatibility or a particular wear result. Use it according to the current package directions; if you experiment with any layered makeup look, test the pairing first and stop if it feels uncomfortable.
When to Keep Lip Oil and Lipstick Separate
Skip the layered look when your lips are already uncomfortable, when either formula pills or separates, or when you need a sharply defined finish that cannot tolerate movement. The American Academy of Dermatology advises stopping lip products that burn, sting, or feel uncomfortable. A glossy result is not worth pushing through irritation.
Also pause if the oil changes color, smell, or texture unexpectedly. Review the current packaging and see the guide on when lip oil expires and should be replaced. Keep personal lip products personal, and do not add water or saliva to change their texture.
Bottom Line
Lipstick first and lip oil second is the most practical order for controlled color with added shine. Apply a thin lipstick layer, let it settle, blot once if needed, and place a small amount of oil at the center before spreading lightly. Keep expectations realistic: formulas vary, the oil may move pigment, and no technique guarantees a smudge-free result. Follow both labels and use the combination only when it feels comfortable.
Sources
- Vogue: Juicy and Blurred—2026’s Lip Trends Go All In on Texture and Finish
- IPSY: Lip Products Are Entering Their Care Era
- Revlon: How to Layer Lip Oils
- FDA: Using Cosmetics Safely
- FDA: Microbiological Safety and Cosmetics
- American Academy of Dermatology: Tips for Dry, Chapped Lips
Related Reading
- Lip Liner or Lip Oil First? A Step-by-Step Layering Guide
- How to Reapply Lip Oil After Eating and Drinking
- How to Keep Your Lip Oil Applicator Clean
Frequently Asked Questions
Select a question to view the answer.
Do you put lip oil before or after lipstick?
Put lipstick on first and lip oil second when you want controlled color with added shine. Let the lipstick settle, then use a small amount of oil.
How do you keep lip oil from smudging lipstick?
Use thin layers, blot lipstick once if it transfers heavily, and place most of the oil at the center instead of sweeping it across the lip edge.
Can you put lipstick over lip oil?
You can experiment, but lipstick may apply less evenly on a slippery oil layer. For more control, start with lipstick and use oil as the finishing step.
Can clear lip oil change lipstick color?
It can change how the color looks by adding reflection and may pick up or move surface pigment. Test the pairing because results vary by formula.
Should you blot lipstick before adding lip oil?
Blot once when the lipstick still transfers heavily or when you want a more controlled edge. If the lipstick has already settled, blotting may not be necessary.
Product & Skin Notice
This article is for general informational purposes only. Individual skin types, sensitivities, and results may vary. Always review the product label, ingredient list, directions, and warnings before use. Discontinue use if irritation occurs, and consult a qualified healthcare professional if you have an existing skin condition, known allergies, or persistent concerns.
Read more

Learn whether cleansing oil goes on wet or dry skin, why water comes later, and how to emulsify and rinse it without adding unnecessary friction.
Learn when micellar water can be a no-rinse cleanse, when to follow with face wash, and how to avoid over-cleansing after makeup or sunscreen.