



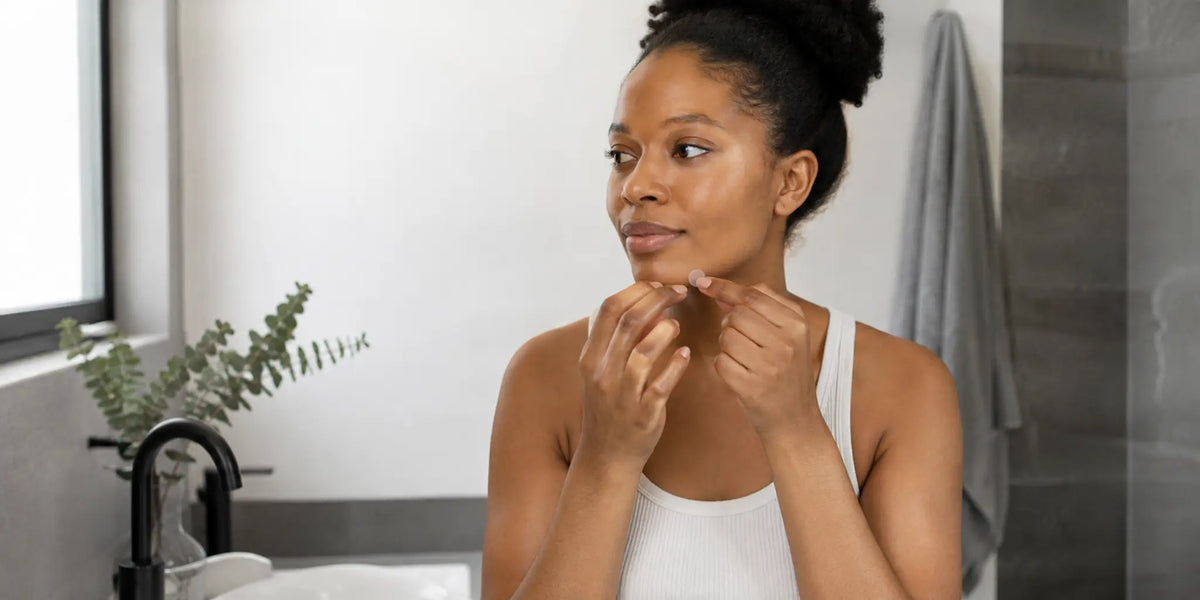
Should You Wash Your Face Before Applying a Pimple Patch?
Yes—wash the area before applying a pimple patch, then dry it completely unless the patch label says otherwise. Clean, dry skin gives the adhesive a simple surface to contact. Put the patch on before serum, moisturizer, facial oil, or sunscreen around that spot, because leave-on layers can make the patch slip or lift.
Read the directions for your exact patch. Plain hydrocolloid stickers, medicated patches, and microdart-style products are not interchangeable. Their wear time, ingredient lists, removal steps, and warnings can differ.
Key Takeaways
- Start with clean hands and a gently washed face.
- Pat the spot completely dry before applying the patch.
- Place the patch before leave-on skincare around that area.
- Follow the labeled wear time instead of leaving it on indefinitely.
- Stop if the adhesive or added ingredients cause unexpected discomfort.
Why Clean, Dry Skin Comes First
A pimple patch needs direct contact with the skin. In its current guide, Cleveland Clinic recommends washing the affected area, drying it thoroughly, and then applying the patch for the maker’s stated time. Moisture and skincare residue can interfere with adhesion, so the order is practical: cleanse, dry, patch, then finish the rest of your routine around it.
Hydrocolloid does not work like a tiny vacuum. A Dermatology Times review published August 15, 2026 explains that the material absorbs fluid already present at the surface and turns into a soft gel. The same review says results vary by the type of spot and that evidence does not support assuming every patch design or every blemish is equivalent.
An earlier randomized double-blind pilot study indexed by PubMed compared a hydrocolloid acne dressing with skin tape. It supports the category’s evidence base, but it does not establish that every modern sticker has identical ingredients, performance, or directions.
Where Does a Pimple Patch Go in Your Routine?
| What is on the spot | Practical next step |
|---|---|
| Makeup, sunscreen, sweat, or visible residue | Remove it, cleanse gently, rinse, and dry before applying the patch. |
| Freshly washed, damp skin | Wait until the area is completely dry. |
| Serum, moisturizer, or facial oil | Check the label. For many adhesive patches, clean the spot and apply the patch before leave-on skincare. |
| A topical product recommended by a clinician | Do not cover it automatically. Ask the clinician or pharmacist whether occlusion is appropriate. |
| Broken, very painful, widespread, or persistently concerning skin | Skip routine experimentation and seek guidance from a qualified healthcare professional. |
How to Apply a Pimple Patch After Washing
Step 01 — Read the patch label
Confirm whether it is plain hydrocolloid or contains added ingredients. Check the intended area, wear time, removal directions, warnings, and storage instructions. The FDA’s cosmetics safety guidance recommends reading the full label, following directions and warnings, and washing your hands before using a cosmetic.
Step 02 — Wash your hands
Clean hands help you avoid transferring visible residue to the patch or backing. Dry your hands before touching the adhesive. If you accidentally touch the sticky surface repeatedly, use a fresh patch rather than trying to rinse and reuse it.
Step 03 — Cleanse without scrubbing
Use lukewarm water and your fingertips. The American Academy of Dermatology’s face-washing guidance recommends a gentle, nonabrasive cleanser and avoiding scrubbing. One careful wash is enough; repeating the cleanse until skin feels tight does not create a better patch surface.
If a daily foam cleanser fits your routine, shop nooni snowflake whipping cleanser. The current 5.07 fl oz listing directs users to lather a small amount on wet hands, massage it over a damp face and neck for 10–15 seconds, rinse with warm water, and pat dry. It says to avoid the eyes and rinse immediately if contact occurs. nooni does not claim that this cleanser changes patch performance, supports patch adhesion, or works with every patch formula.
Use only as much cleanser as you need. Our guide to how much face cleanser to use explains why product directions matter more than oversized amounts.
Step 04 — Pat the area completely dry
Press a clean towel lightly against the skin instead of rubbing. Check the hairline, jaw, and sides of the nose for water. Give the area another moment to air-dry if it still feels damp.

Step 05 — Apply the patch before leave-on skincare
Peel the patch from its backing with clean, dry fingertips. Center it over the intended spot and press according to the label. Avoid stretching the sticker or repeatedly lifting and replacing it, which can weaken the seal.

Apply serum, moisturizer, and other leave-on products around the patch unless its directions say differently. Do not put a product under the sticker simply because a social post combines the two. Covering a topical ingredient can change how the area is exposed to that ingredient.
Step 06 — Remove it on schedule
Use the labeled wear time and replace the patch only as directed. Peel slowly rather than pulling sharply. Do not pop or squeeze the spot before applying a sticker; the AAD’s acne skin-care guidance advises keeping hands off and avoiding picking or squeezing.
For a deep, painful spot, a sticker may not be the right tool. AAD guidance for deep, painful pimples emphasizes gentle care and professional support when the concern persists or multiple deep spots appear.
Common Mistakes to Avoid
- Applying to damp skin: Give the area time to dry so the adhesive can make contact.
- Layering skincare underneath: Unless the label explicitly permits it, keep leave-on products away from the covered spot.
- Using the patch as a whole-face solution: A small sticker is a spot-level product, not a replacement for a broader routine or professional advice.
- Ignoring added ingredients: Medicated and microdart patches may have different warnings from plain hydrocolloid.
- Over-washing: If your face is already clean, do not add an extra wash solely out of habit. Review how long to wash your face for a simple, label-led approach.
Bottom Line
Wash before applying a pimple patch when makeup, sunscreen, sweat, or residue is present. Rinse thoroughly, pat the area completely dry, place the patch before leave-on skincare, and follow its labeled wear time. The clean-and-dry order helps the adhesive contact the skin; it does not guarantee how a specific spot will look afterward.
Sources
- Dermatology Times: Social Media Mythbusters—Hydrocolloid Pimple Patches, August 15, 2026
- Cleveland Clinic: Can Pimple Patches Make a Zit Go Away?
- American Academy of Dermatology: Acne Skin-Care Tips
- U.S. Food and Drug Administration: Using Cosmetics Safely
- PubMed: Randomized Double-Blind Pilot Study of an Acne Dressing
Related Reading
- How Much Face Cleanser Should You Use? A Practical Guide
- How Long Should You Wash Your Face? Is 60 Seconds Necessary?
- Should You Wash Your Face With a Washcloth or Your Hands?
Frequently Asked Questions
Select a question to open the answer.
Should I wash my face before putting on a pimple patch?
Do pimple patches go before or after moisturizer?
Can I put a pimple patch on damp skin?
Can I put serum under a pimple patch?
Should I pop a pimple before applying a patch?
Product & Skin Notice
This article is for general informational purposes only. Individual skin types, sensitivities, and results may vary. Always review the product label, ingredient list, directions, and warnings before use. Discontinue use if irritation occurs, and consult a qualified healthcare professional if you have an existing skin condition, known allergies, or persistent concerns.
Read more

Wash your face before using an LED mask unless its manual says otherwise. Follow a clean, dry-skin routine and review essential device safety checks.
Most leave-on sheet masks do not need a rinse. Learn when to use water, how to read the label, and which skincare step should come next for you.