


Complete Guide to Making Lip Balm at Home in 2026
Craving soft, healthy lips in 2026? Discover how easy it is to create your own lip balm at home with a few simple, eco-friendly ingredients—no complicated steps required.
This guide will show you how to craft a nourishing, non-sticky, silky lip oil that doubles as a long-lasting tint and plumper. Experience deep hydration with Apple Seed Oil and fruit extracts, all in a vegan, cruelty-free formula that rivals any gloss for shine, but without the stickiness.
Ready to unlock the secrets of personalized beauty? Dive in to learn about essential ingredients, step-by-step methods, creative customizations, and the latest DIY trends for making lip balm at home in 2026.
Why Make Lip Balm at Home in 2026?
Making lip balm at home in 2026 is more than a trend—it is a joyful, nourishing ritual that puts you in control of your beauty routine. Imagine crafting a silky, non-sticky balm that hydrates, plumps, and tints your lips, all while using eco-friendly, vegan ingredients. The benefits go far beyond soft lips, touching on wellness, creativity, and sustainability.
The Benefits of DIY Lip Balm
Creating lip balm at home is both cost-effective and empowering. A single homemade tube can cost as little as $0.11, compared to the $3–4 price tag for store-bought options. This means you save money while gaining full control over every ingredient that touches your lips.
You can choose nourishing oils like apple seed oil for deep hydration and a silky, non-sticky finish. Essential oils and vitamin E act as gentle preservatives, supporting lip health naturally. Embracing the process is fun and creative, and you can personalize each batch for your needs and mood.
For a step-by-step approach and more inspiration, see this DIY Natural Lip Balm Guide.
The Rise of Eco-Friendly and Vegan Beauty in 2026
2026 brings an exciting shift toward eco-friendly and vegan beauty. Making lip balm at home aligns perfectly with these values. By choosing plant-based waxes and butters, you create a vegan product that feels silky and hydrating without relying on animal-derived ingredients.
Many DIYers now use upcycled fruit extracts and locally sourced oils, minimizing environmental impact. Reusable containers and minimal packaging further reduce waste. Each homemade balm supports cruelty-free standards and reflects a commitment to gentle, sustainable beauty.
Comparing DIY Lip Balm to Store-Bought Options
When you make lip balm at home, you know exactly what you are applying. Commercial balms often contain hidden chemicals or “addictive” ingredients that can actually dry lips out, leading to a cycle of reapplication.
Homemade blends, especially those rich in nourishing oils, provide lasting hydration and comfort. Users frequently report that their lips feel softer and healthier, with fewer reactions and better moisture retention. The transparency and simplicity of your own formula ensure peace of mind and a pleasant, non-sticky texture—something glosses rarely deliver.
Feature |
DIY Lip Balm at Home |
Store-Bought Balm |
|---|---|---|
Ingredient Control |
Full |
Limited |
Cost per Tube |
$0.11 |
$3–4 |
Hydration |
Deep, lasting |
Often surface-level |
Vegan Options |
Yes (customizable) |
Sometimes |
Addressing Common Lip Concerns
Dry, chapped, or sensitive lips are common struggles. Lip balm at home lets you address these issues with pure, gentle ingredients. Shea butter and coconut oil deeply moisturize, while vitamin E and antioxidants help repair and protect.
For those with delicate skin, you can create formulas free from fragrances, allergens, or nut oils. Add in fruit extracts for a natural tint or a touch of extra nourishment. The result is a balm that soothes and softens, with a silky, plumping effect and a comfortable, non-sticky feel.
The 2026 DIY Beauty Trend: Personalization and Wellness
Personalization is at the heart of beauty in 2026. With lip balm at home, you can tailor every aspect—texture, scent, tint, and benefits—to your lifestyle and local climate. Try infusing your balm with adaptogens, aromatherapy oils, or fruit-based tints for a unique touch.
The latest trend is the 2-in-1 balm and tint hybrid, merging deep hydration with a gentle, lasting stain. Apple seed oil adds a plumping effect, while vegan, cruelty-free standards let you feel good about every swipe. This approach transforms a simple balm into a wellness ritual that celebrates both creativity and elevated simplicity.
Essential Ingredients and Tools for Homemade Lip Balm
Making lip balm at home is a rewarding experience that combines creativity with conscious self-care. By mastering the essentials, you can craft nourishing, beautiful balms that rival any store-bought product. Let’s explore the key ingredients, tools, and tips you need to get started with lip balm at home.
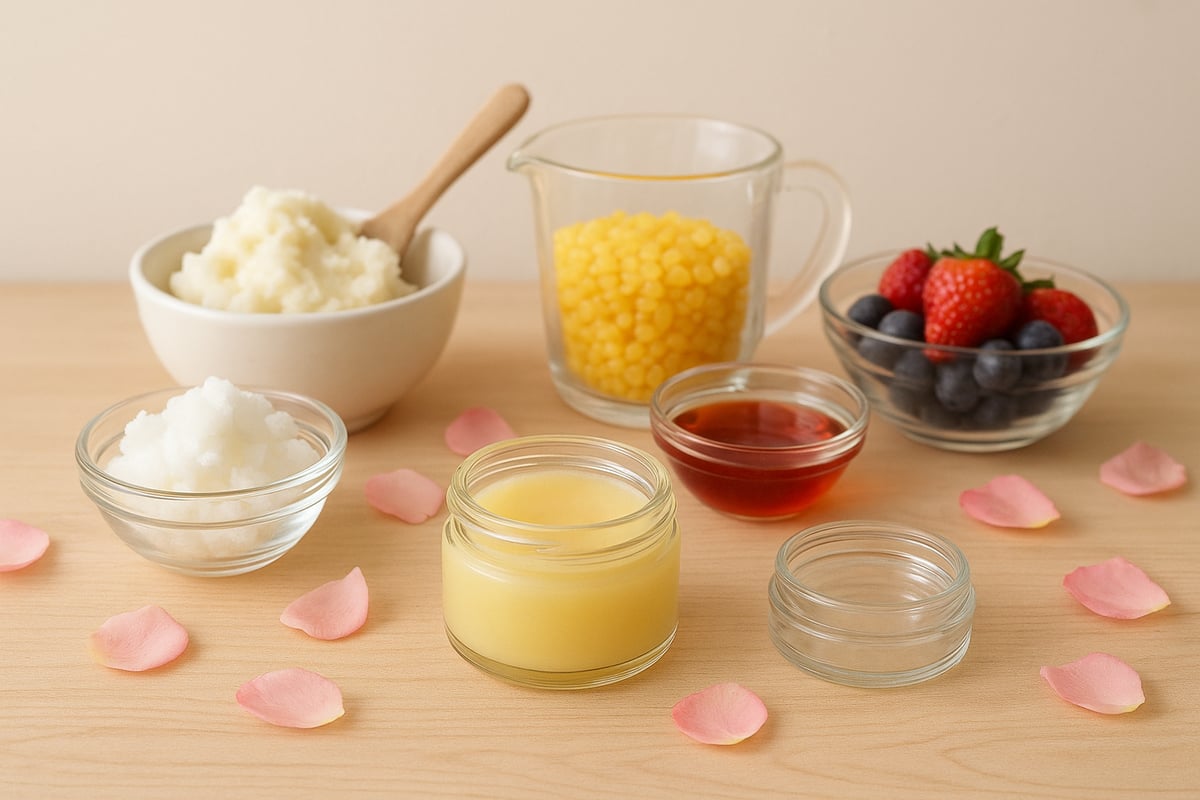
Key Ingredients and Their Benefits
Every great lip balm at home begins with carefully chosen ingredients. Beeswax provides structure and helps lock in moisture, while plant-based butters like shea, cocoa, and mango deeply nourish lips. For hydration, carrier oils such as coconut, jojoba, almond, or avocado are favorites.
A touch of vitamin E oil acts as a natural preservative and antioxidant, extending freshness. Essential oils like peppermint or rosemary add scent and extra benefits. For vegan formulas, candelilla or carnauba wax replace beeswax beautifully.
If you love a non-sticky, silky texture with a plumping effect and long-lasting tint, Apple Seed Oil is a standout. It delivers deep hydration and a 2-in-1 function as a tint and oil, offering all the shine of gloss without any stickiness. Learn more about these nourishing oils and their unique benefits in the Nourishing Lip Oil Benefits guide.
Choosing the Right Containers
Selecting containers for lip balm at home is both practical and fun. Popular choices include reusable lip balm tubes, sleek metal tins, and charming glass jars. Each has its perks: tubes are portable and mess-free, tins are easy to fill and reuse, and glass jars are eco-friendly and elegant.
Size options vary from standard 0.15 oz tubes to 0.5 oz tubs, or you can customize to suit your needs. Reusing containers is not only sustainable but also reduces costs significantly. Consider labeling each batch for easy identification and gifting.
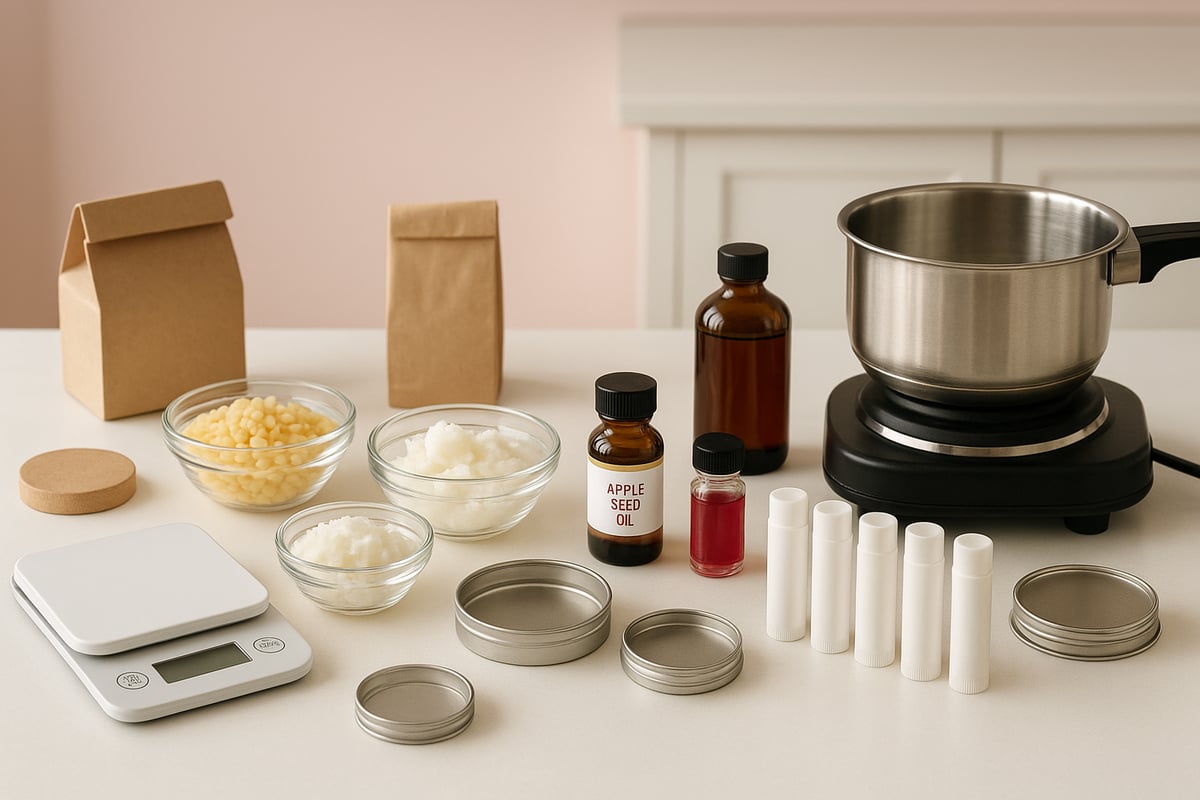
Must-Have Tools and Equipment
A few simple tools make preparing lip balm at home efficient and enjoyable. Start with a double boiler or a heat-safe glass measuring cup for gently melting your ingredients. A digital kitchen scale ensures precise measurements, crucial for consistent results.
You’ll also need a metal spoon or spatula for mixing, and a pouring kit helps transfer the mixture into containers without spills. Don’t forget cleaning supplies—thoroughly washed and dried tools and containers help maintain the quality and safety of your homemade creations.
Sourcing High-Quality, Sustainable Ingredients
Where you source your ingredients matters for both results and sustainability in lip balm at home. Look for local co-ops, online specialty shops, or farmers’ markets. Prioritize certified organic, fair trade, vegan, and cruelty-free options.
Opting for upcycled or locally sourced oils and butters lowers your environmental impact. Fresh, high-quality ingredients not only enhance the performance of your lip balm at home but also align with eco-friendly and wellness-focused beauty trends.
Safety and Allergen Considerations
Safety is key when making lip balm at home. Always patch test essential oils and butters, especially if you or loved ones have sensitive skin. Avoid nut oils if allergies are a concern, and clearly label any shared or gifted balms with full ingredient lists.
Proper labeling helps everyone enjoy your creations safely. Mark vegan or allergen-free recipes for easy identification. With mindful ingredient choices and clear labeling, you can create lip balm at home that’s safe, soothing, and suitable for all.
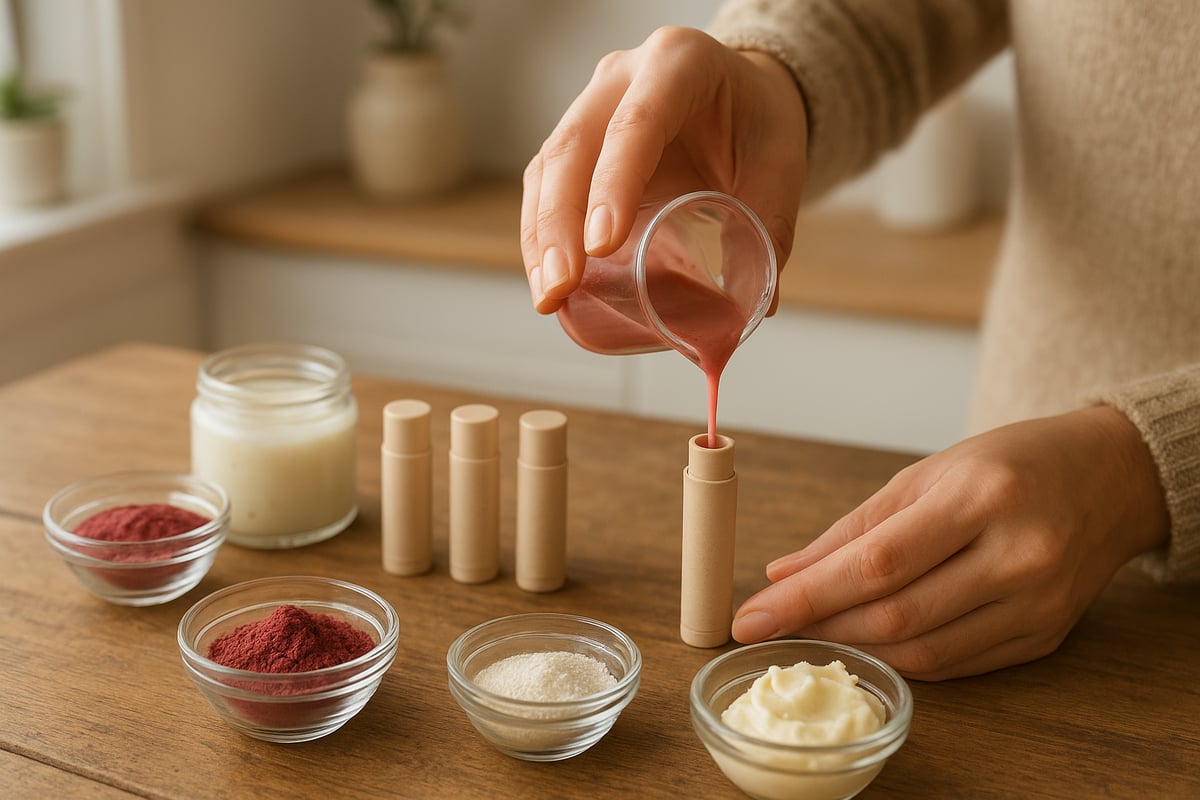
Step-by-Step Guide: How to Make Lip Balm at Home
Ready to create your own nourishing lip balm at home? This easy guide walks you through every step, from prepping containers to customizing your perfect formula. Enjoy the process and discover how you can achieve a non-sticky, silky texture with deep hydration, lasting tint, and a gentle plumping effect using simple, vegan, and cruelty-free ingredients.
Prepping Your Workspace and Containers
Before you make lip balm at home, start with a clean, organized space. Hygiene is essential for both safety and longevity of your product.
Wash reusable tubes, tins, or glass jars thoroughly with hot, soapy water.
Boil containers for five minutes to eliminate any lingering bacteria or residue.
Set containers upside down on a clean towel to air dry completely. Any moisture left can encourage mold, which you want to avoid.
Prepare all your tools: double boiler (or a heat-safe glass cup), kitchen scale, metal spoon, and a pouring kit if you have one.
Lay out your ingredients and equipment within easy reach. This setup makes the process smoother and helps prevent spills. Organizing your workspace before making lip balm at home ensures an efficient and enjoyable DIY experience.
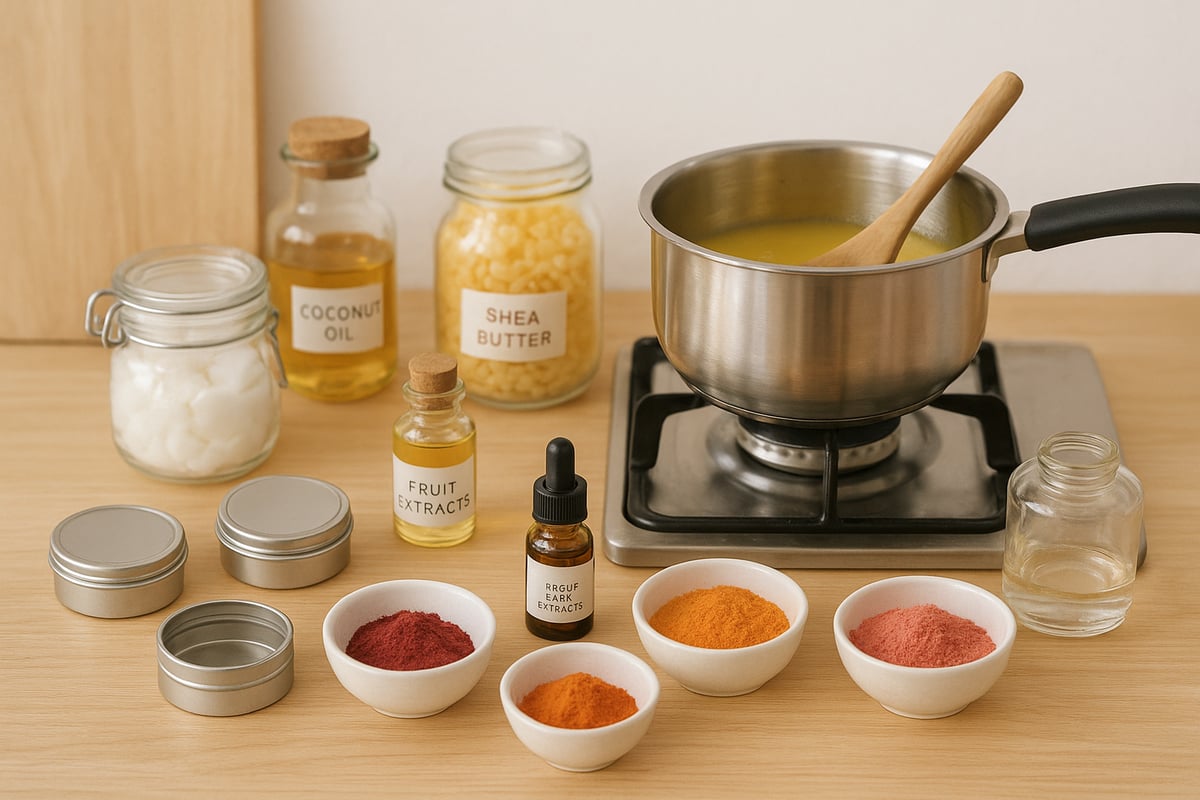
Measuring and Melting Ingredients
Precise measurements are the secret to the perfect silky, non-sticky lip balm at home. Use a kitchen scale for accuracy.
Here’s a sample base recipe for a deeply hydrating balm:
Ingredient |
Amount |
Benefit |
|---|---|---|
Coconut oil |
1 oz |
Deep hydration, silky texture |
Beeswax (or vegan) |
1 oz |
Structure, moisture lock |
Cocoa butter |
0.5 oz |
Nourishment, softness |
Shea butter |
0.4 oz |
Plumping, silky finish |
Vitamin E oil |
1/2 tsp |
Antioxidant, preservative |
Melt beeswax, butters, and oils together in a double boiler or glass cup set in simmering water. Stir gently with a metal spoon until fully combined.
Monitor the temperature to avoid overheating delicate oils like apple seed oil, which delivers non-sticky hydration and a plush, plumping effect. With the right blend, you’ll get long-lasting comfort and a stain or tint that rivals any gloss—without the stickiness. Making lip balm at home means you always know exactly what’s in your product.
Customizing Your Lip Balm Formula
Personalizing your lip balm at home is where creativity shines. Adjust the base for a firmer or softer balm by tweaking the wax-to-oil ratio. For a vegan and cruelty-free formula, swap beeswax for candelilla or carnauba wax.
Add essential oils for scent and gentle plumping:
Peppermint oil for a cooling, plumping sensation
Lavender or vanilla for soothing comfort
Rosemary for a fresh, herbal note
Want a hint of color? Mix in fruit powders, beetroot, or mica for a natural tint. Apple seed oil is an excellent addition for a non-sticky, silky texture and deep hydration, turning your balm into a 2-in-1 tint and oil.
For more inspiration, check out this MasterClass DIY Lip Balm Recipe for step-by-step variations and expert tips.
Pouring and Setting the Lip Balm
Once your mixture is smooth, it’s time to pour your lip balm at home. Act quickly, as the mixture can solidify as it cools.
Set all containers upright and close together.
Use a small funnel or pouring kit to fill tubes or tins. Pour slowly to avoid spills or air bubbles.
If you have extra mixture, pour it into a small jar for later use.
Allow balms to cool at room temperature for about an hour. You’ll see the silky, glossy surface form as they set. If you want a professional touch, gently wipe any spills and polish the containers once cool. This step ensures your lip balm at home looks as good as it feels.
Troubleshooting Common Issues
Sometimes, your lip balm at home might not turn out perfect on the first try. Here are solutions for common problems:
Grainy texture: Remelt the balm gently, stir well, and let it cool slowly.
Too soft or too firm: Add more wax for firmness or more oil for softness, then remelt and reset.
Separation: Ensure all ingredients are fully melted and combined before pouring.
Mold or spoilage: Always dry containers thoroughly and use vitamin E oil as a preservative.
If you notice your balm isn’t as hydrating or silky as desired, try increasing apple seed oil or shea butter. These ingredients boost plumping and hydration, giving your lips a healthy, glossy look without any stickiness.
Storing and Labeling Your Homemade Lip Balm
Proper storage keeps your lip balm at home fresh and effective. Store balms in a cool, dry place, away from direct sunlight. Excess heat can cause melting or separation.
Label each container with:
Ingredients
Date made
Scent or tint
Homemade balms with vitamin E and essential oils can last up to two years. For gifts or sharing, clear labeling helps friends identify vegan, allergen-free, or tinted formulas.
Enjoy the satisfaction of making lip balm at home that’s tailored to your needs, with a silky, non-sticky feel, long-lasting tint, and deep hydration—all in a simple, joyful process.
Personalizing Your Lip Balm: Tints, Scents, and Special Additions
Creating your own lip balm at home means every tube can reflect your unique style, mood, and needs. Personalization is at the heart of the DIY experience, making each balm a little luxury for your lips. Whether you crave a subtle tint, a signature scent, or extra skincare benefits, the possibilities are endless and accessible.
Creating Tinted Lip Balms with Natural Ingredients
Adding color to your lip balm at home is a joyful way to express yourself while nourishing your lips. Natural tinting options like beetroot powder, fruit extracts, and mica offer beautiful shades without synthetic dyes. For a rosy glow, blend a pinch of beetroot powder into your melted base. Cocoa powder gives a cozy, warm tint, perfect for everyday wear.
If you want inspiration or step-by-step ideas, explore Creating Tinted Lip Balms for creative ways to achieve everything from subtle blushes to bolder stains. The secret to a smooth, even color is mixing the tint thoroughly before pouring. Enjoy the non-sticky, silky texture and long-lasting stain that rivals any store-bought gloss, but with the deep hydration of Apple Seed Oil.
Scent and Flavor Combinations to Try in 2026
Scent transforms a simple lip balm at home into a sensory delight. Essential oils such as peppermint, lavender, orange, and vanilla are all-time favorites for their gentle fragrance and flavor. Try blending peppermint and vanilla for a cooling, plumping effect that feels fresh and lively.
Experiment with combinations like orange-lavender or a hint of rosemary for a unique twist. Each scent not only enhances your mood but also delivers skincare benefits. The right essential oils can add a cheerful burst to your routine, making every application feel comforting and special.
Adding Extra Benefits: Plumping, Moisturizing, and SPF
Elevate your lip balm at home by infusing it with extra care. For deep hydration, Apple Seed Oil is a standout ingredient, giving lips a silky, non-sticky finish and long-lasting comfort. To achieve a gentle plumping effect, add a drop or two of cinnamon or ginger extract—just enough for a subtle tingle.
If outdoor protection is a priority, mix in non-nano zinc oxide for a natural SPF boost. Compare this to a traditional gloss and you'll notice the difference—hydration without stickiness, plus a 2-in-1 tint and oil effect for healthy, beautiful lips all day.
Benefit |
Ingredient Example |
Result |
|---|---|---|
Plumping |
Cinnamon extract |
Fuller, softer lips |
Moisturizing |
Apple Seed Oil |
Silky, hydrated, non-sticky |
SPF |
Non-nano zinc oxide |
Sun protection, gentle finish |
Vegan, Cruelty-Free, and Eco-Friendly Customizations
Making lip balm at home lets you align beauty with your values. Choose vegan waxes like candelilla or carnauba instead of beeswax for a plant-based formula. Select fruit extracts and upcycled butters for a cruelty-free, eco-conscious approach.
Opt for reusable glass jars or metal tins to minimize waste. Clearly label your creations as vegan or allergen-free, especially if sharing. With every batch, you support sustainability while pampering your lips with clean, nourishing ingredients. Enjoy the peace of mind that comes from knowing your lip care is as kind to the planet as it is to your skin.
Advanced Tips and Trends for DIY Lip Balm in 2026
Staying ahead in lip balm at home recipes means embracing the latest science and beauty breakthroughs. In 2026, DIYers are blending innovation with nature for the softest, healthiest lips yet. Let’s explore the most exciting trends and pro tips that elevate your homemade creations.
The Science of Longer-Lasting Hydration
Modern lip balm at home formulations focus on deep, lasting moisture. Emulsifiers and humectants, like plant-based glycerin, help lock in hydration. Layering rich butters, such as shea and cocoa, with lightweight oils creates a barrier that keeps lips soft for hours.
Apple Seed Oil is a hero ingredient, delivering a non-sticky, silky texture and a plumping effect. Unlike gloss, these oils hydrate without any tackiness. For more inspiration and ingredient ideas, visit the Hydrating Lip Care Collection to see how professional blends achieve all-day softness.
Exploring 2-in-1 Lip Balm and Tint Hybrids
The 2-in-1 trend has taken lip balm at home recipes to the next level. These hybrids offer both a long-lasting tint and deep hydration, thanks to fruit extracts and nourishing oils.
A standout example is a tinted lip oil that combines apple seed oil for a silky feel with beetroot or berry extracts for a healthy flush of color. This formula delivers a plumping effect and a beautiful stain, without the stickiness of traditional gloss. Customizing your balm with vegan, cruelty-free ingredients meets the demand for conscious beauty.
Embracing K-Beauty Innovations in Lip Care
K-Beauty continues to inspire the world of lip balm at home, introducing advanced actives and playful textures. DIYers now infuse their balms with fruit extracts, adaptogens, and plant-based ceramides for visible results.
K-Beauty-inspired balms are celebrated for their non-sticky, glossy finish and deep hydration. Apple Seed Oil is often paired with vegan waxes to create a silky, plumping effect that lasts. The 2-in-1 tint and oil approach delivers both care and color, all in a single swipe.
Sustainability and Upcycling in Homemade Lip Balm
Sustainability is at the heart of every lip balm at home trend in 2026. DIYers are reusing containers, choosing upcycled ingredients, and supporting local producers. This shift not only reduces waste but also delivers unique, eco-friendly results.
For the latest zero-waste ideas, check out Sustainable Beauty Trends 2026. Using leftover fruit peels for natural extracts or colors is a creative way to make your balm both beautiful and responsible. Eco-friendly packaging, like glass jars and metal tins, completes the experience.
Frequently Asked Questions About Making Lip Balm at Home
Curious about how to perfect your lip balm at home? These FAQs cover everything from shelf life to vegan swaps, so you can craft silky, non-sticky, deeply hydrating balms with confidence. Let’s answer your top questions, focusing on comfort, safety, and the nourishing power of fruit extracts and Apple Seed Oil.
How Long Does Homemade Lip Balm Last?
Homemade lip balm at home, when stored correctly, typically lasts between 12 and 24 months. The longevity depends on your recipe’s ingredients and how you store your balm. Adding vitamin E oil and pure essential oils, such as rosemary or peppermint, helps preserve freshness by preventing oxidation and mold growth.
To maximize shelf life, always keep your lip balm at home in a cool, dry place away from direct sunlight. Avoid letting water get into your containers, as moisture can shorten the balm’s lifespan. If you want to see how your DIY lip balm compares to store-bought favorites, check out the Best Recommended Lip Balm Guide for inspiration and tips.
Can I Make Lip Balm Without Beeswax?
Absolutely, you can make lip balm at home without beeswax by choosing vegan and cruelty-free alternatives. Plant-based waxes like candelilla, carnauba, or soy wax work beautifully, offering a silky, non-sticky texture and reliable hold. These waxes also support the growing demand for ethical, sustainable beauty.
Adjust your formula slightly, as vegan waxes are often firmer than beeswax. Start with a smaller amount and test the balm’s consistency as you go. This approach lets you enjoy all the benefits of a hydrating, plumping, and tinted 2-in-1 balm, while staying true to vegan values. For more on the shift toward vegan cosmetics, explore the Vegan Cosmetics Market Growth report.
How Do I Fix Common Texture Problems?
Graininess, separation, or too-soft balm are common challenges when creating lip balm at home. If your balm feels grainy, gently remelt it using a double boiler and stir thoroughly to dissolve any crystals. For balms that are too soft, add a little more wax and remelt to achieve a firmer texture. If it’s too hard, increase the amount of nourishing oils or butters, such as Apple Seed Oil or shea butter.
Always allow your balm to cool slowly and undisturbed, which helps prevent texture issues. This simple troubleshooting ensures your lip balm at home remains creamy, glossy, and comfortable—never sticky or clumpy.
Is Homemade Lip Balm Safe for Sensitive Skin?
Homemade lip balm at home can be wonderfully gentle for sensitive lips if you select hypoallergenic, pure ingredients. Always patch test new recipes on your skin, especially if you’re using essential oils or nut-based butters. Opt for fragrance-free blends or use mild oils like Apple Seed Oil, which provides deep hydration and a silky finish without irritation.
Label your creations clearly, especially if sharing or gifting, and always avoid known allergens. By taking these precautions, your lip balm at home will deliver nourishing, comforting care in every swipe.
Now that you know how easy and rewarding it is to create nourishing lip balm at home using the latest eco friendly techniques, why not take your lip care a step further? If you love the idea of plant based hydration and glossy, healthy looking lips, you’ll appreciate how innovative K beauty solutions can elevate your routine. Whether you’re exploring new DIY trends or searching for a deeply moisturizing finish, discover the rich nourishment and shine of our best selling formula. Ready to experience next level lip care for yourself?
[Shop the Viral Apple Lip Oil! 🍎]
Read more
Discover the 7 best lip mask moisturizer picks for 2026. Explore advanced formulas for soft, hydrated lips plus expert tips and ingredient trends for lasting results.
Discover the top discount lip balm picks for 2026, featuring expert tips, ingredient insights, and proven routines for soft, smooth lips at affordable prices.